Getting Started
Flashing Your Device
Using the MeshCore Web Flasher is similar to the Meshtastic one if you are already familiar with the process with one exception.
- Connect your device to your computer via USB
- Select your device from the list (MichMesh Node is ProMicro nrf52 (faketec))
- Select your node's role type (see Node Role Types for an explanation)
- Click the Enter DFU Mode, select your device from the pop-up
- IMPORTANT - Click Erase Flash, select your device from the pop-up. This MUST be done if this is a first time MeshCore flash for the device!
- Click Flash, select your device from the pop-up.
Setting Up Your Device (Companion)
If your device has a screen, like the Heltec v3/v4 or T114, you will get the bluetooth pin. I suggest paying attention and writing it down because the screen time out on some of these units is quick. If you missed it, simply reset it and it will pop up and give you a new pin. OTHERWISE, the default is 123456.
Quick Setup by QR (Android)
If you use MeshCore Hardened, connect your radio in the app and scan this code. It sets the Michigan radio preset (910.525 MHz, 62.5 kHz, SF7, CR 5) and 2-byte path hashes. It doesn't set a region, since scoping is on hold. The app shows you the settings and asks before applying anything.
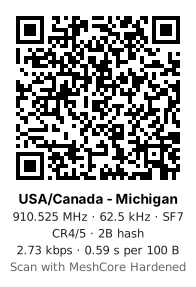
The code carries no transmit power or channel keys, so it's safe to print or post. Once it's applied, pick up the manual steps below at setting your name.
Manual Setup
- Connect via Bluetooth. IF This is a device you previously paired, you'll first want to "forget" the device in your phone's/computer's bluetooth settings.
- Go to Settings (Cog Icon in Android App)
- Set your Name. Unlike MeshTastic, there is only a "Long Name".
- Set your Lat/Long if your node is stationary. Select "Share Position in Advert" if you would like.
- In Radio Settings, select "Choose Preset". Select USA/Canada (Recommended) if in the US.
- Tap the "Check Mark" in the upper right (if on Android). This applies the current settings.
- Leave the region scope blank for now. See Set Your Region below, including how to undo a scope you already set.
- Bluetooth Settings - Change it to "Custom" and put in a 6 digit pin. Tap Check mark in upper right (if on Android) then scroll down and reboot. You will need to reconnect to the device (select forget from phone/computers menu first).
No need to erase and re-flash. On boards with a user button, hold it down within 8 seconds of boot for CLI Rescue mode, then run set pin <new_pin> from the Console on the web flasher.
Set Your Region
Michigan repeaters are defining regions, but scoping is on hold until operators agree to move together. For now:
- Don't set a default scope on your companion, and don't scope any channels. Leave both blank.
- If you already set either one, undo it with the steps below. A repeater only passes on a scoped message if it carries that region, so a companion still scoped to
migoes quiet beyond any repeater that hasn't definedmiyet. - Adding regions to your app's list is fine. It only saves names in the app, ready for later, and changes nothing on the radio.
Screenshots are from firmware 1.17.1, the MeshCore app 1.50 (Android), and MeshCore Hardened 0.10.11.
Undo Region Scoping
MeshCore App
-
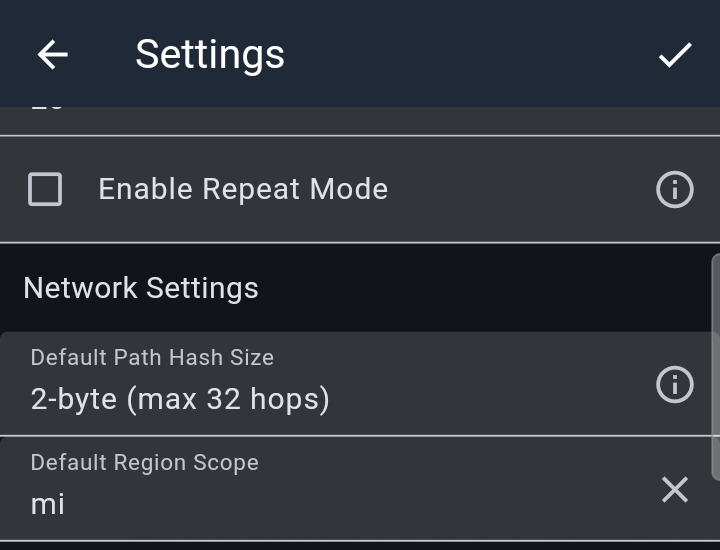
Open Settings (the gear) and scroll to Network Settings. If Default Region Scope shows a region, tap the ✕ next to it, then tap ✓ at the top of Settings. Nothing in Settings is saved until you tap ✓. In app 1.43 this setting is under Settings → Experimental Settings.
-
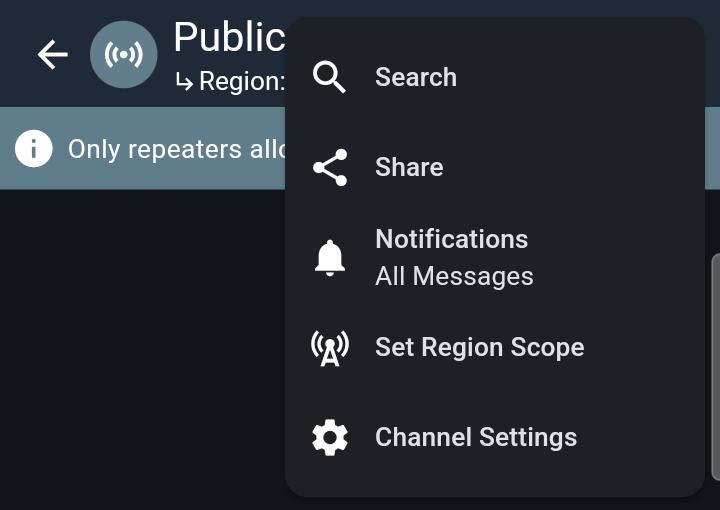
Check each channel. A channel that sends with a scope shows Region: under its name. A ↳ in front means it's following the default you cleared in step 1:

If you gave a channel its own scope, open it, tap ⋮ → Set Region Scope, then ⋮ → Clear Scope.

MeshCore Hardened
Update to MeshCore Hardened 0.10.11 or later first. In earlier versions, Clear doesn't remove a default scope saved on the radio.
-
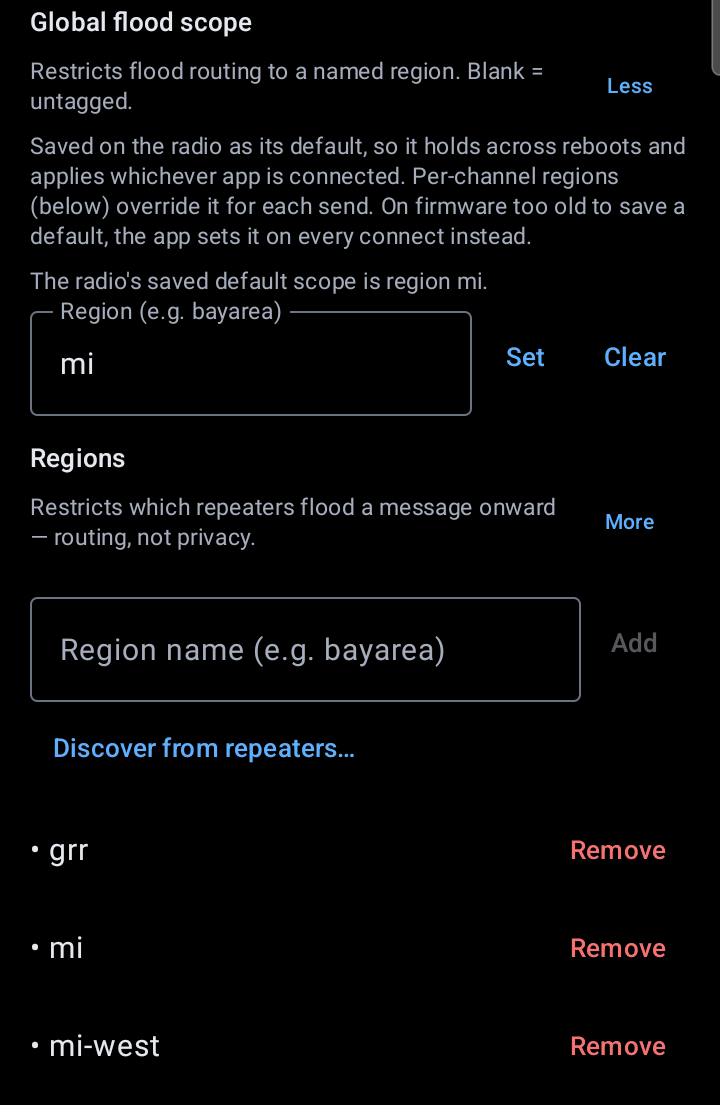
Open Settings → Mesh policies. Under Global flood scope, tap Clear. The line above the field changes to The radio has no saved default scope.
-
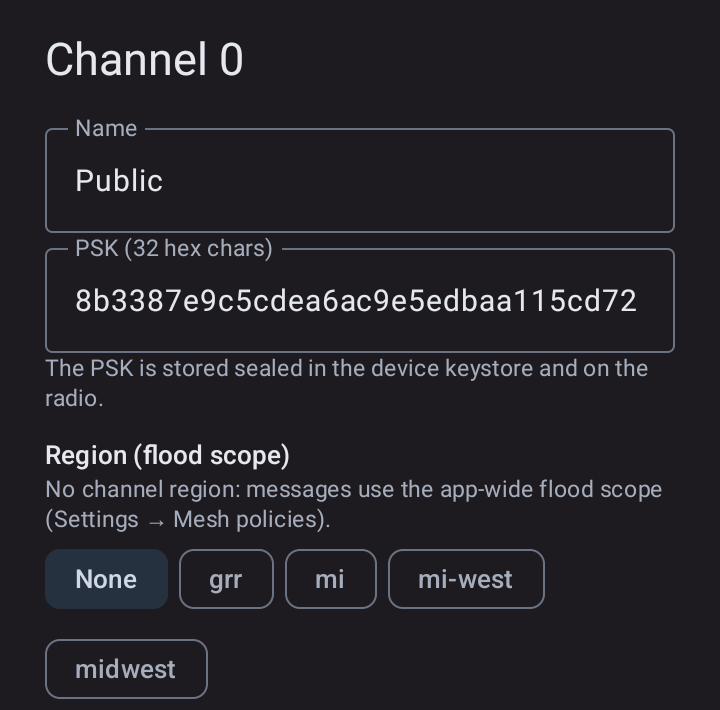
Open each channel, tap ⋮ → Channel settings…, choose None under Region (flood scope), and tap Save.
Add Regions to Your App (Optional)
Your app can ask nearby repeaters which regions they carry and save the names, so they're ready to pick once scoping starts. Only repeaters your radio hears directly answer, and each one answers at most 4 requests every 3 minutes, so if one doesn't reply, wait and try again. Needs companion firmware 1.15 or later.
-
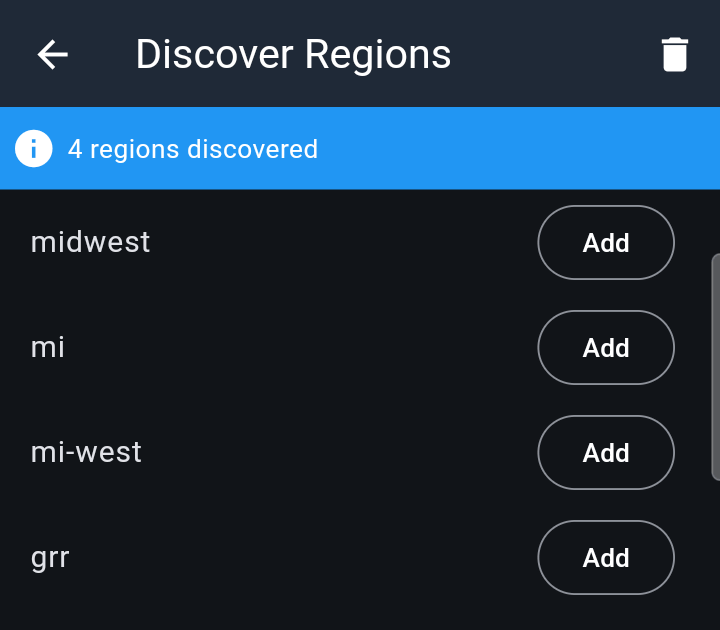
MeshCore app: Settings → Network Settings → Default Region Scope opens the region list. Tap ⋮ → Discover Regions, tap the Discover Regions button, then tap Add next to each region. Back out with the ✕, not by picking a region: picking one would set it as your default scope.
-
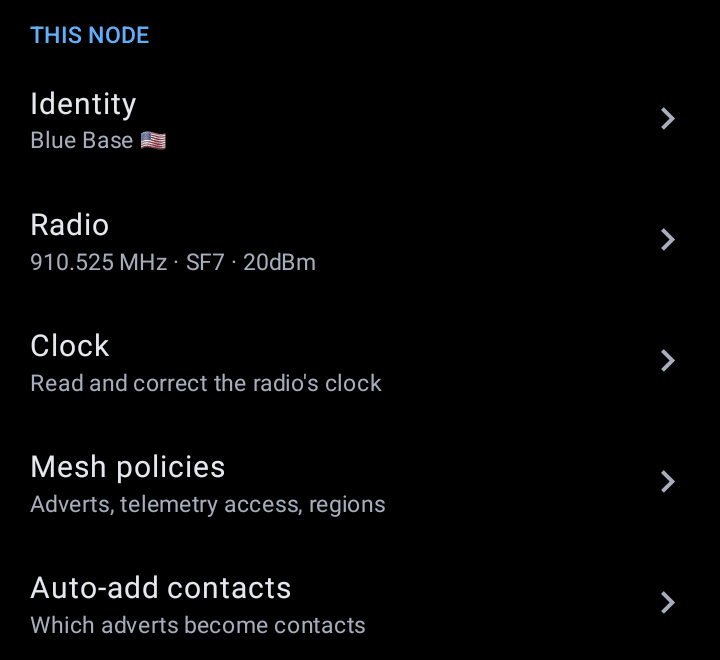
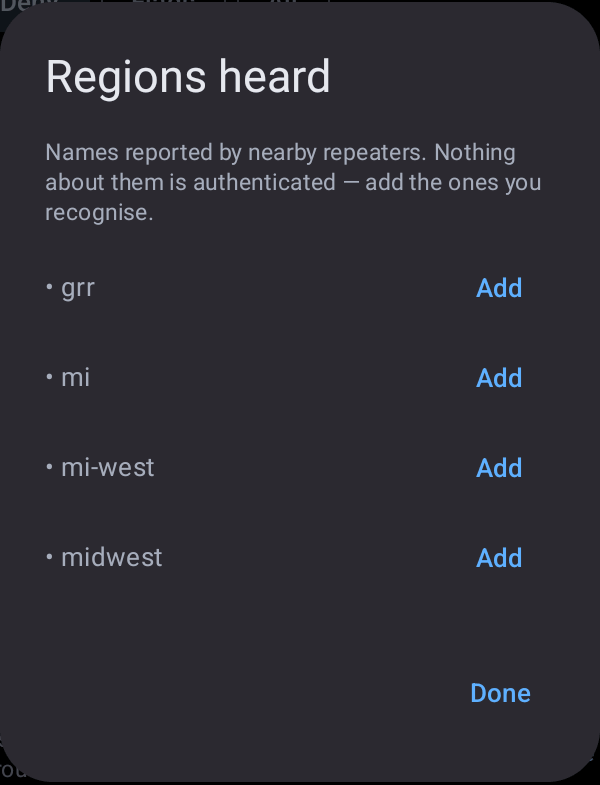
MeshCore Hardened: Settings → Mesh policies, then under Regions tap Discover from repeaters…, Add each region, and tap Done. Leave Global flood scope blank.
From here, it depends on your personal preference and if you have any sensors attached.
Sensors
On boards with sensor support built in, the firmware auto-detects common I2C parts: BME280 and BMP280, the AHT and SHT temperature and humidity families, LPS22HB, and the INA power monitors. Wire one up to VCC, GND, SDA and SCL and it shows up on its own.
GPS
GPS ships disabled. Turn it on under Position settings, tap that sub-menu's "Check Mark" in the upper right, then leave the submenu and select the "Check Mark" in the upper right in the main settings menu.